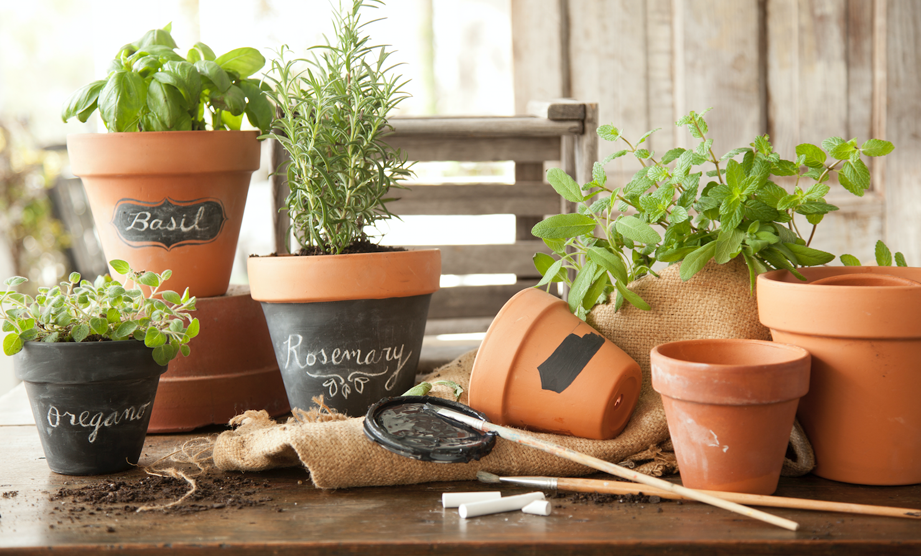
We are always looking for a fun way to jazz up the fresh herb planters in our at-home container gardens. We wanted them labeled but to also have a fun and fresh look. Paula’s craftiness has rubbed off on us it seems because we finally decided on chalkboard herb pots, and we couldn’t be happier with how they came out. Follow these easy steps to make your own!
Materials Needed:
- Terracotta pots
- Pencil
- Chalkboard paint
- Paintbrush
- Newspaper
- Chalk
- Gravel
- Soil
- A variety of your favorite herbs to plant
Pick out the pots you want to paint; there should holes in the bottom for proper drainage. We used basic and affordable terracotta pots, and they worked great. Wash the empty pots, and make sure they are clean and free of debris. Let them dry fully after washing.
Use a pencil to make an interestingly shaped outline of a label. Place the pot on newspaper and carefully fill in the stenciled area with the chalkboard paint. If you prefer, you can paint the whole pot. We liked how both turned out. Let dry for a few hours before filling.
Once dry, fill a quarter of the pot with gravel. This will help your plant drain properly. Fill the rest of the pot with soil, leaving just a few inches from the top. Place the roots of the herbs into the soil, leaving a few inches between each stem. Pat down, and once in place, thoroughly water until you see water draining from the bottom of the pot. Place in a sunny spot, and watch your plants grow!
What do you think of our herb pots? Would you try this at home? Do you have other ideas for sprucing up your container garden? Let us know in the comments below!